Jupyter Notebook has been the staple of any data scientists and data analysts out there who work with Python. In fact, most online Python and data science courses are taught using Jupyter Notebook. While Jupyter Notebook is simple and beginner-friendly, it is no longer the best tool when you are working on a larger data analysis project.
In this article, I’m going to share with you 7 compelling reasons why you should switch from Jupyter Notebook to Jupyterlab for your next data project.
What is Jupyterlab?
First of all, you may or may not know it already - JupyterLab is the latest web-based interactive development environment for notebooks, code, and data. Installing Jupyterlab is very simple via conda or pip:conda install -c conda-forge jupyterlab
or,pip install jupyterlab
Note that if you are using Python 3 on MacOS, you should use pip3 instead of pip.
Why Jupyterlab?
There are many reasons why Jupyterlab is a much better tool than the classic Jupyter notebooks. Here are the top reasons why, and I believe some of them will blow your mind.
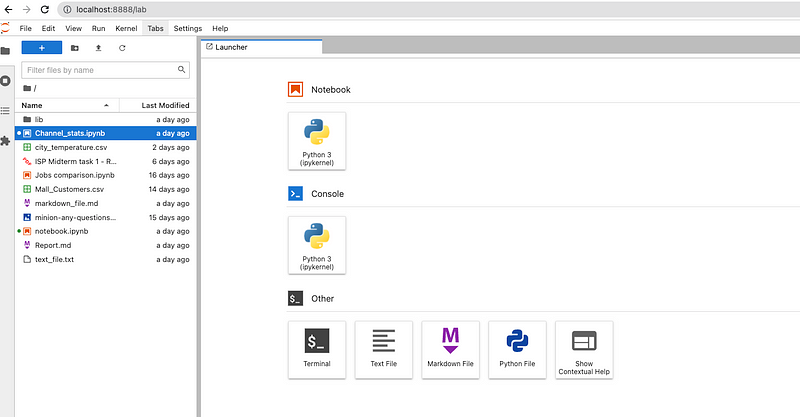
#1. Everything is in one view
If you are ever fed up with having to switch between different tabs all the time just to view the root directory or to create a new file in Jupyter notebooks, I hear you! This is one of the key differences that Jupyterlab will make in your data science life. It brings the classic notebooks, text editor, terminal, and directory viewer all under one view. It makes everything more efficient for you and creates a more unified experience that you will love. Now you can work on your notebook, interact with the terminal, and write on your markdown file, all at the same time!
#2. Viewing CSV is so much better
You may have noticed that we can only view CSV files as text files in Jupyter notebook. But in Jupyterlab, you can view it in table format just like in Excel. I have also tried to open large CSV files of a few million rows in Jupyterlab, and it works like a charm, without any glitch. So next time if you can’t open a CSV file in Excel because it’s more than 1 million rows, you know where to look.
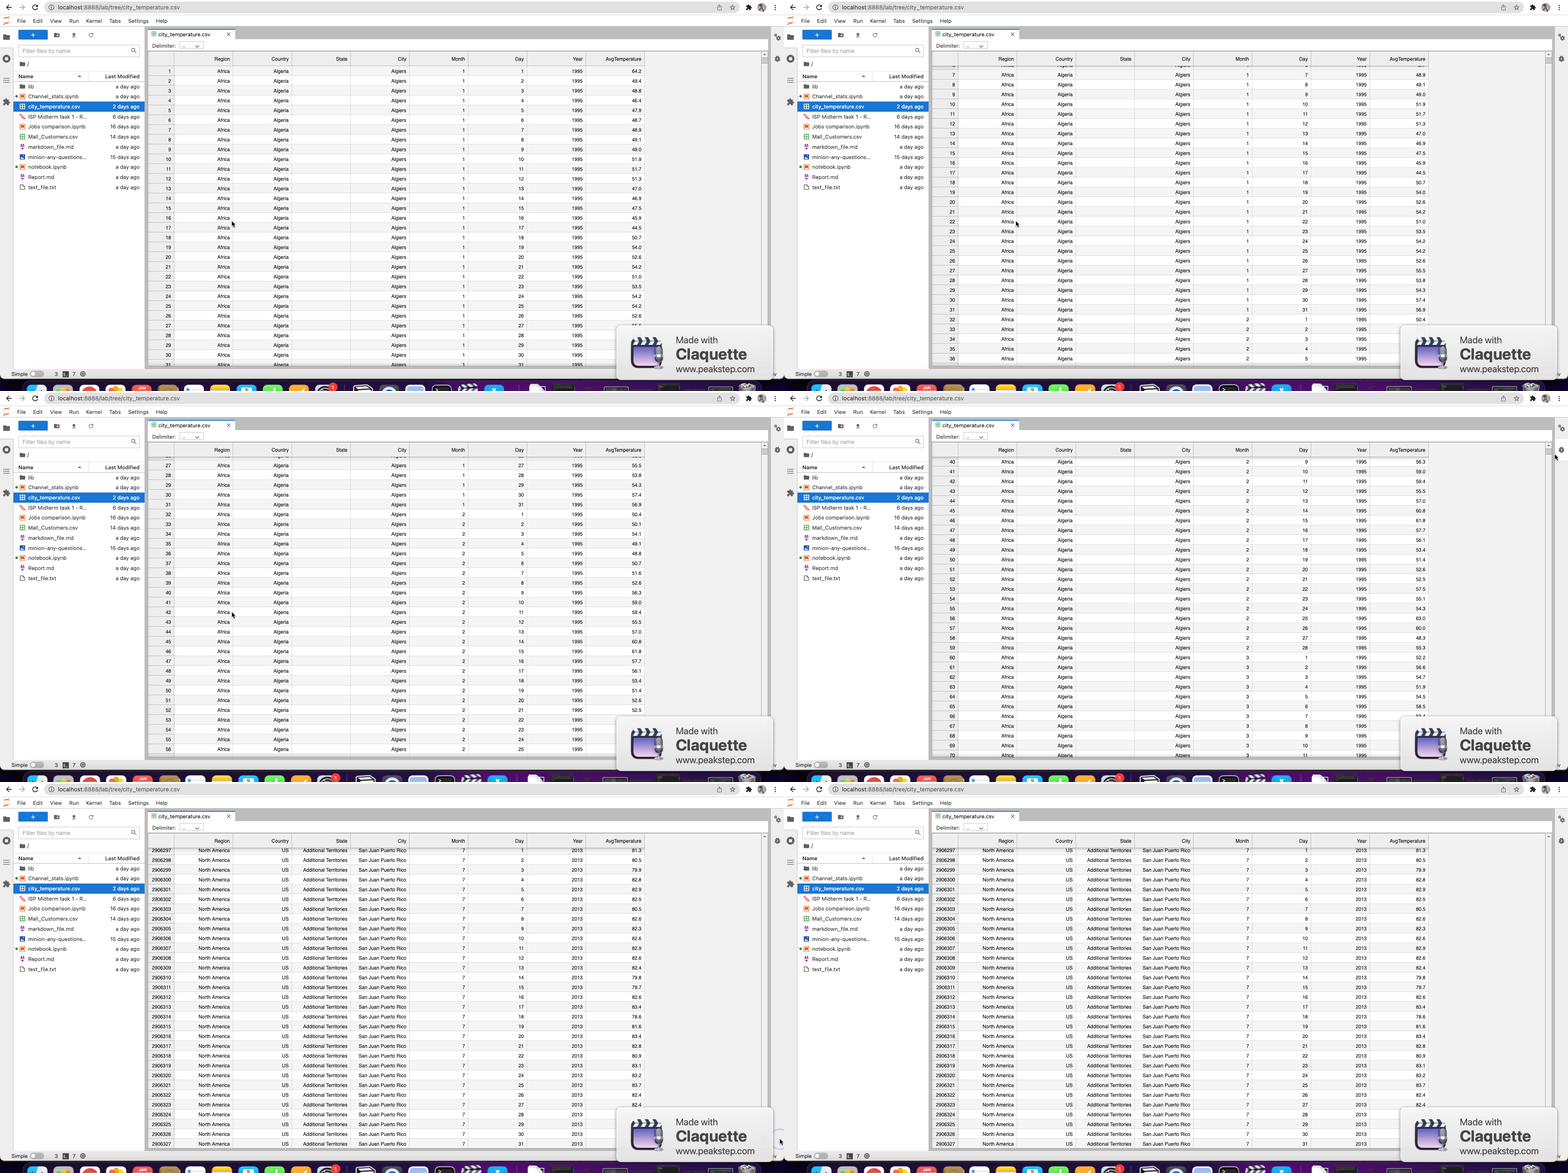
And not only CSV, but you can also view PDF files, pictures, and markdown files, which is very handy when you are reading a PDF document while working on your project’s report at the same time.
#3. Second view for notebooks
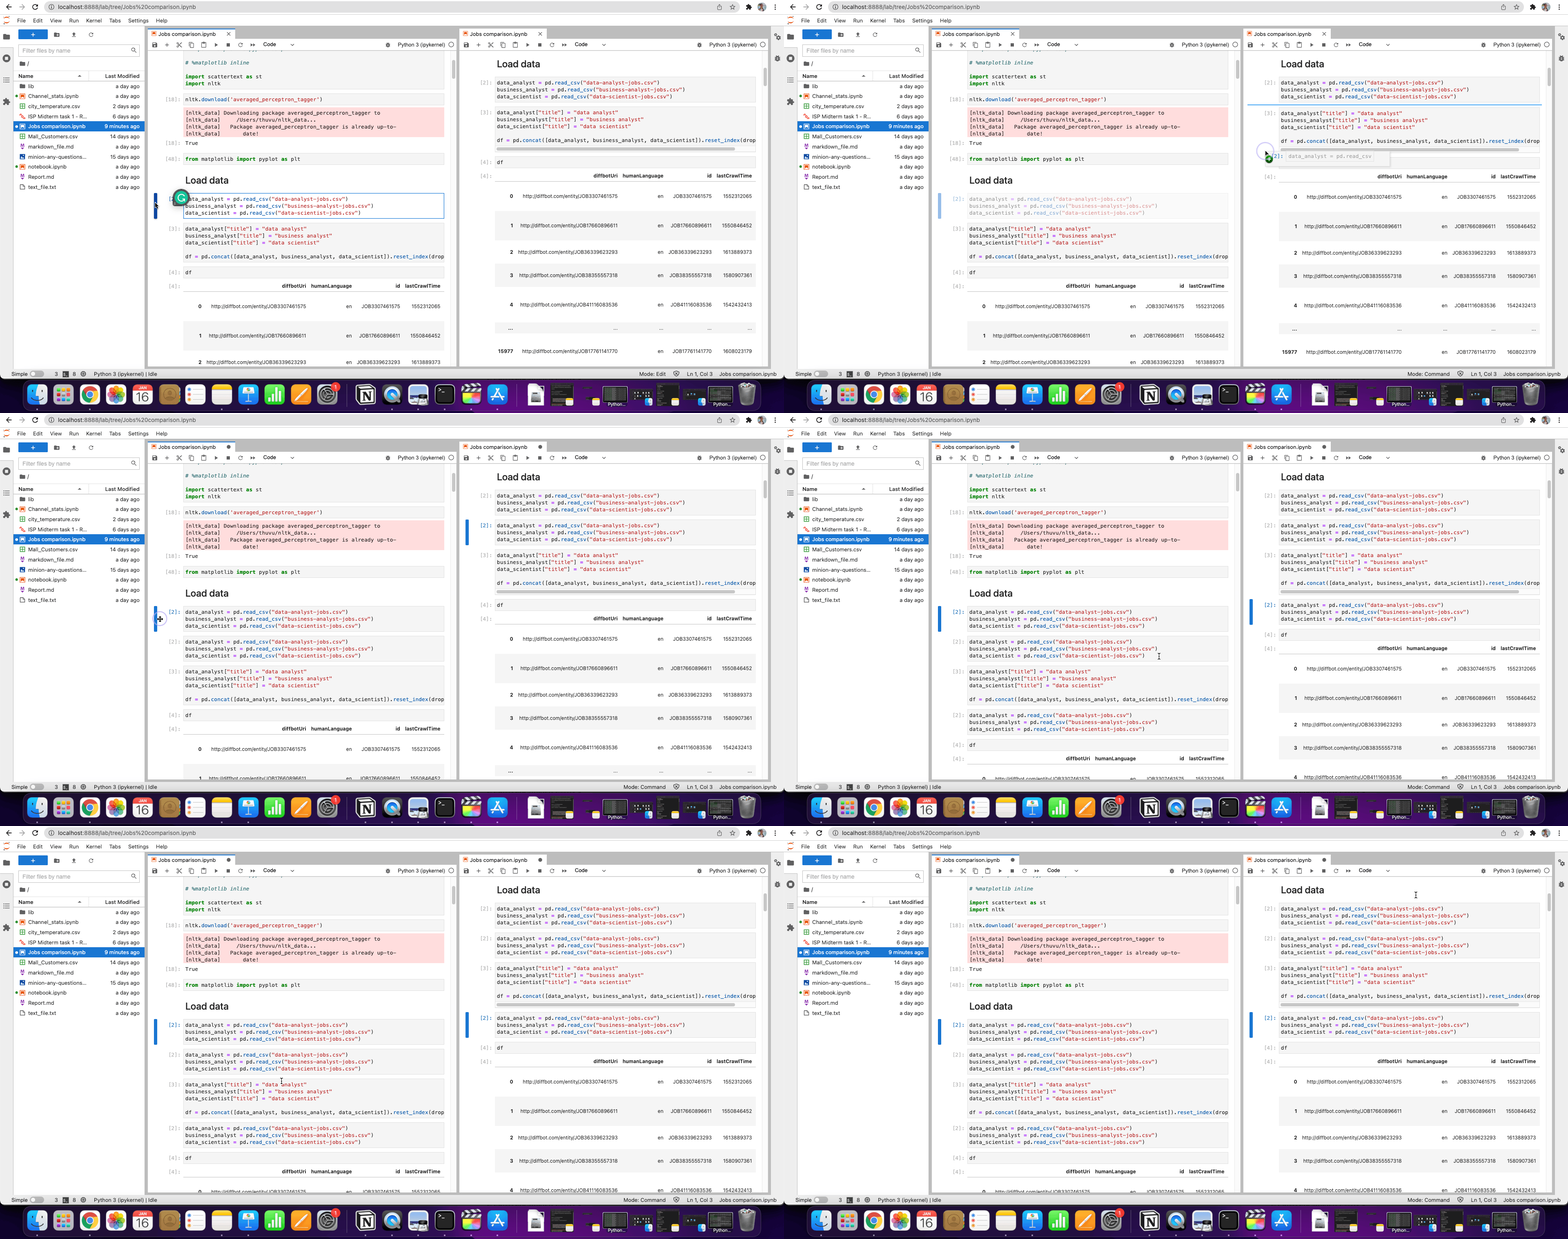
This is definitely one of my favorite features in Jupyterlab: You can create a second view for your notebook and put the two views side-by-side for comparison. All you need to do is to right click on your notebook tab header and select New View for Notebook.
The good thing is any change you make to either of the views will also be reflected in the other and will be saved in the notebook!
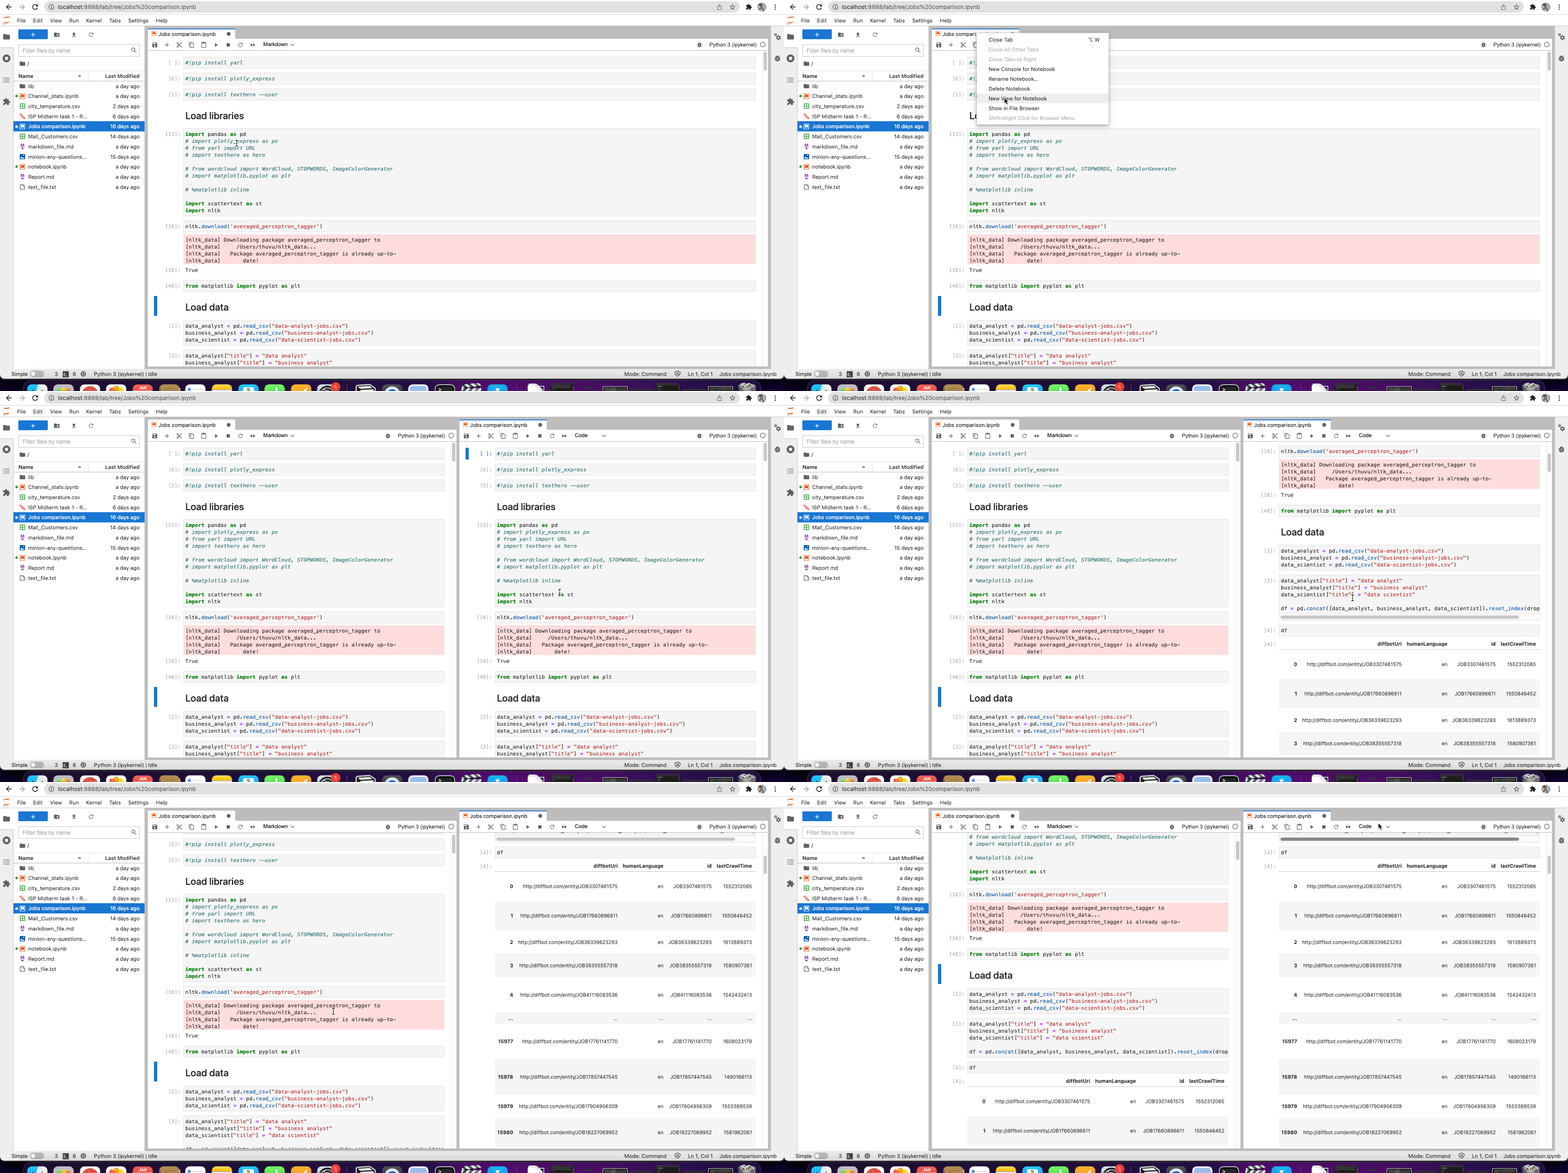
I find this functionality very useful when my notebook becomes bigger and I would have to scroll back and forth a lot. For example, if I want to check the names of the columns, instead of having to print out the dataframe again and again or scrolling up to where I actually printed it out, I will just open the dataframe in a separate view. This prevents me from writing redundant code and cleaning up later and also saves me a lot of time scrolling.
#4. Split views
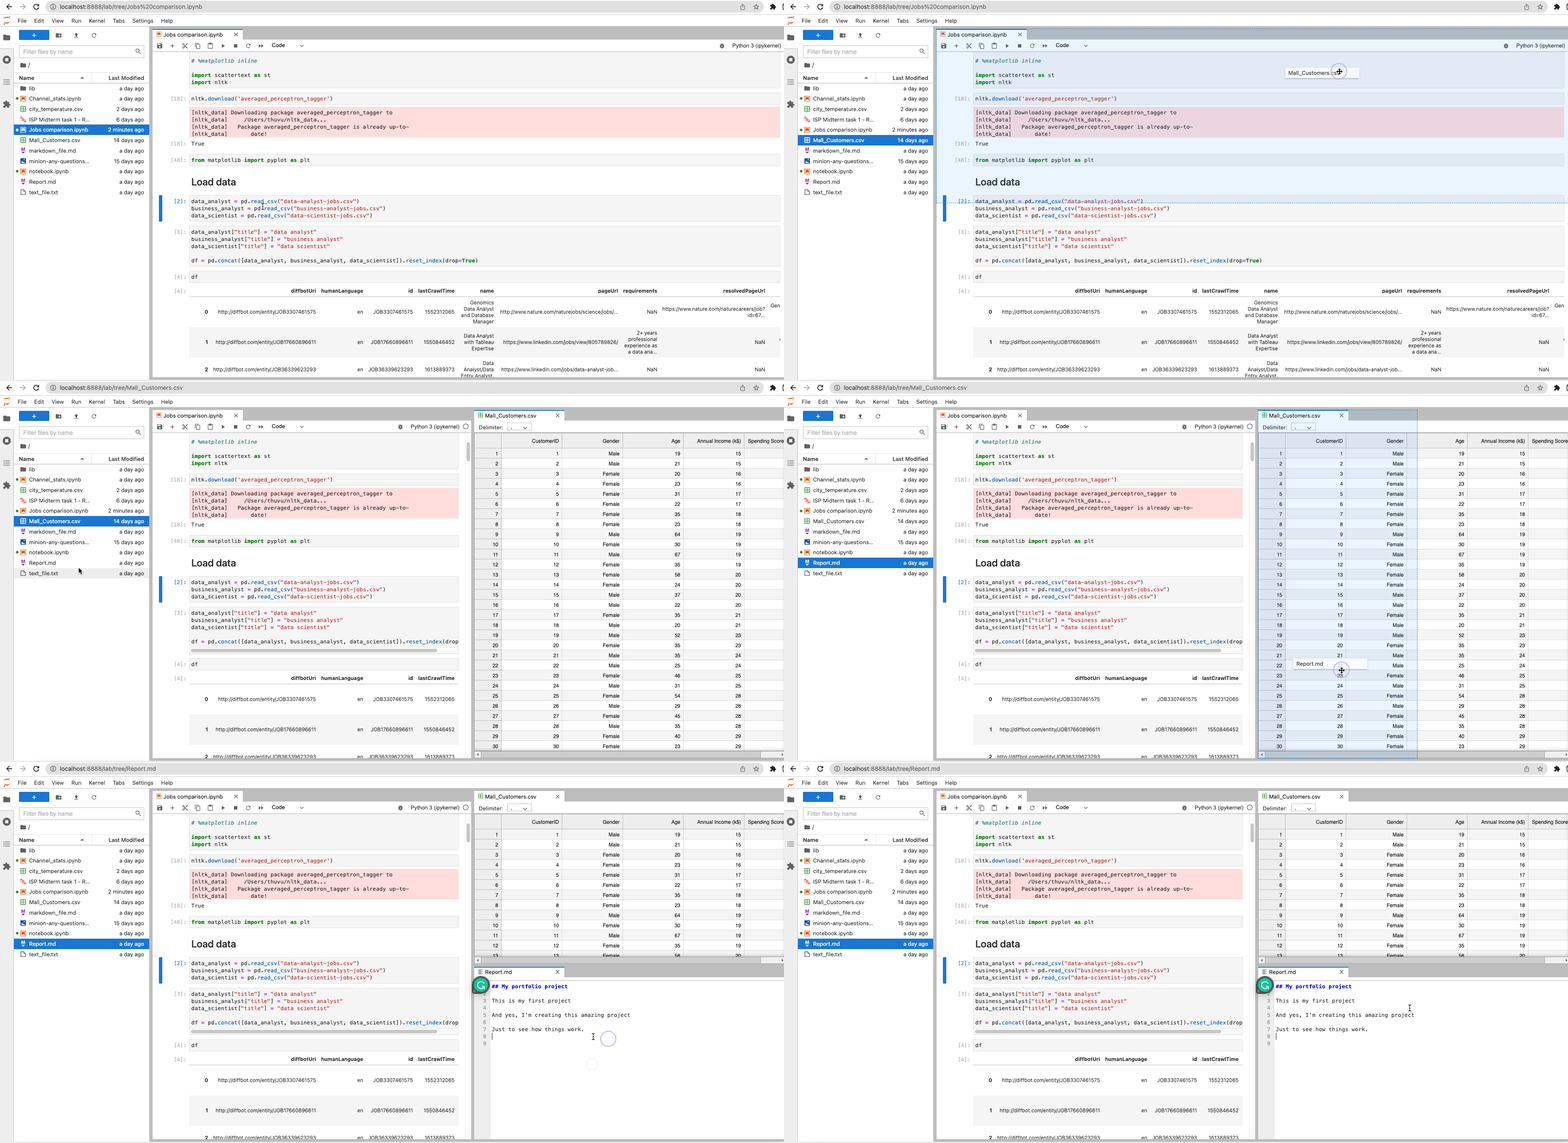
Point number 4 is an extension of the number 3 above, but this time we can split the view even further with just some drag and drop. Now you can view and work on several notebooks and files simultaneously. I just love how flexible everything is, and it really feels like a real IDE and I am in control of how I want to arrange my workflow. Honestly, I don’t miss at all painfully switching between tabs like I used to do when working with Jupyter notebooks.
#5. Rearranging cells in notebooks
Point number 5 is you can actually drag cells to rearrange them. This is not possible in classic Jupiter notebooks, and that’s what often annoys me the most when cleaning up and rearranging my notebook just so it makes sense to the audience. Now this will blow your mind, you can actually drag a cell from one notebook to another one in the split view, that’s how you copy a cell from one notebook to another. You probably don’t usually need to do that, but if you do that’s pretty neat.
#6. Code consoles
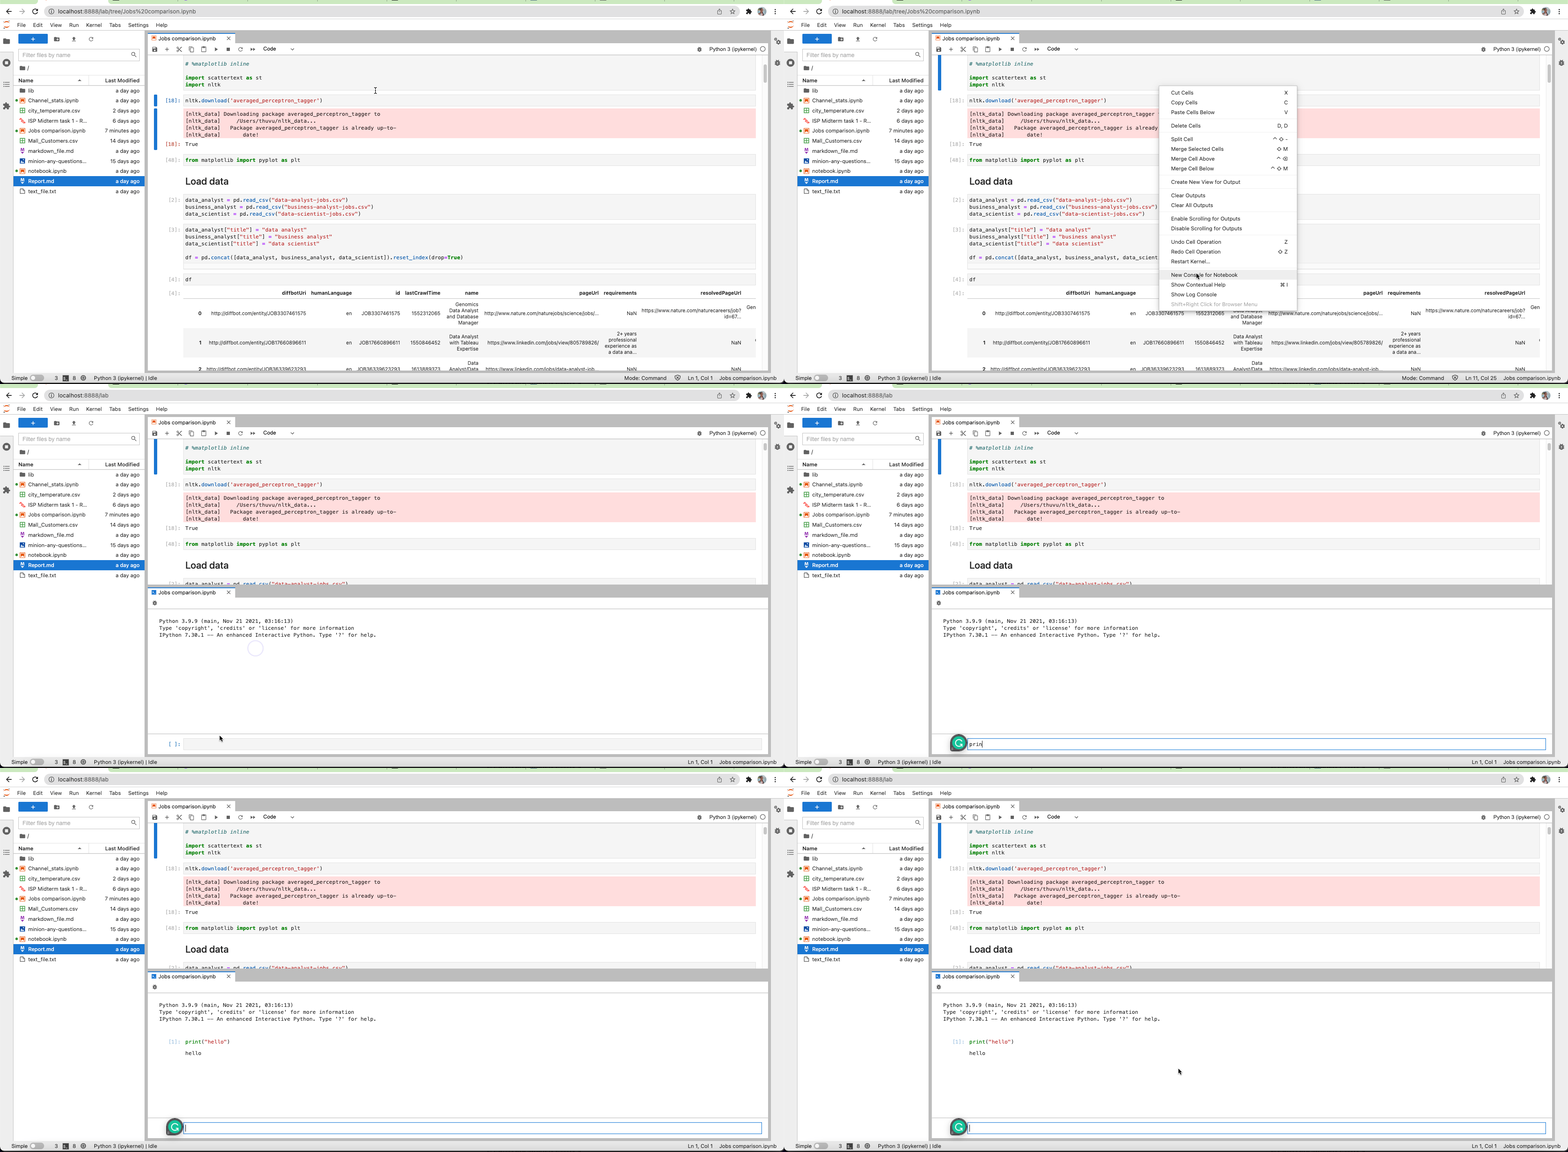
If we want to test out a piece of code or check out what a function returns, we usually turn to code consoles because it’s the most simple way to run code. Code consoles are really the place designed for testing code because of the interactivity they provide. In Jupyterlab, all you have to do is to right-click anywhere in the notebook and select New Console for Notebook. Then you can head to the code console and play with your code here.
#7. Simultaneous preview for Markdown
Quite often you would want to share your data science project with the community, or simply document what you have done. In Jupyter Notebooks it’s quite frustrating to write Markdown because you have to run your cell again and again just to preview and check how the file looks and if you got the right syntax. In Jupyterlab, you can preview your markdown file by right-clicking anywhere on your file and selecting Show markdown preview, and now you can see your document being updated live as you are typing. This feature is extremely convenient and will save you a lot of time when writing your document.

Jupyterlab has become my favorite tool for data analysis in Python, and I think you should definitely give it a try and see how it improves your analysis workflow or your Python learning experience if you are new. It is definitely one of the best things I have done to improve my productivity in Python.
If you have reached this part of the post, thank you for reading and also your attention! You can also find the video version of this article on my Youtube channel below.
If you like my content about data science (and occasional tech-related stuff and personal growth), don’t forget to follow me here on Medium.
Want to connect? You can reach me on LinkedIn, Youtube, or GitHub. I’m always open for a quick chat or virtual coffee :).

